Are you one of the legacy Spring developers? Are you annoyed with the restarting of Spring Boot application every single time you make a small change in your java classes? I feel your pain bruh 😀 , but not anymore! 😉 Here is how to hot swap in spring boot application!
Spring Boot has released a magical dependency for all the developers called spring-boot-devtools, as a part of Spring Boot 1.3.
I enables the developers to use much important features like live-reload (hot swap), remote debugging, etc.
Alright, lets talk about business! How to hot swap in spring boot application.
Step 1. spring-boot-devtools Dependency.
In case you didn’t select the spring-boot-devtools while creating your spring boot application, here is what you need to do.
Find the pom.xml file in your maven project and add the dependency provided below in the <dependencies> tag.
<dependency>
    <groupid>org.springframework.boot</groupid>
    <artifactid>spring-boot-devtools</artifactid>
</dependency>
If you’re using gradle, find the build.gradle file in your project and add the below dependency.
developmentOnly 'org.springframework.boot:spring-boot-devtools'Step 2. Enable Auto-build
Now we need to enable the feature that allows the reloading of the class by rebuilding the project and then hot-swapping it.
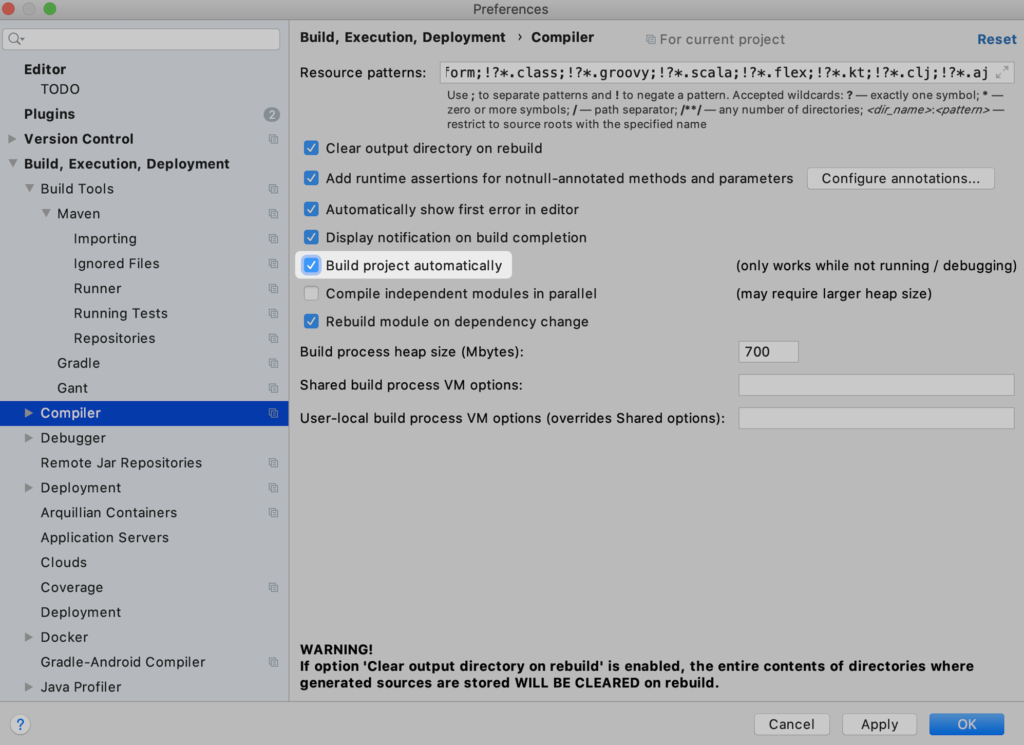
I order to do that, open the preferences of your IntelliJ and file the Build-Execution-Deployment in the sidebar. You will find Compiler on the top, click on that.
Check and enable the Build project automatically, as shown in the screen-grab below, and save the setting by clicking Apply.

Step 3. Enable Auto-make while Running
The last thing you need to do it enable auto-make while the application is running. You will have to do it by enabling a property in registry.
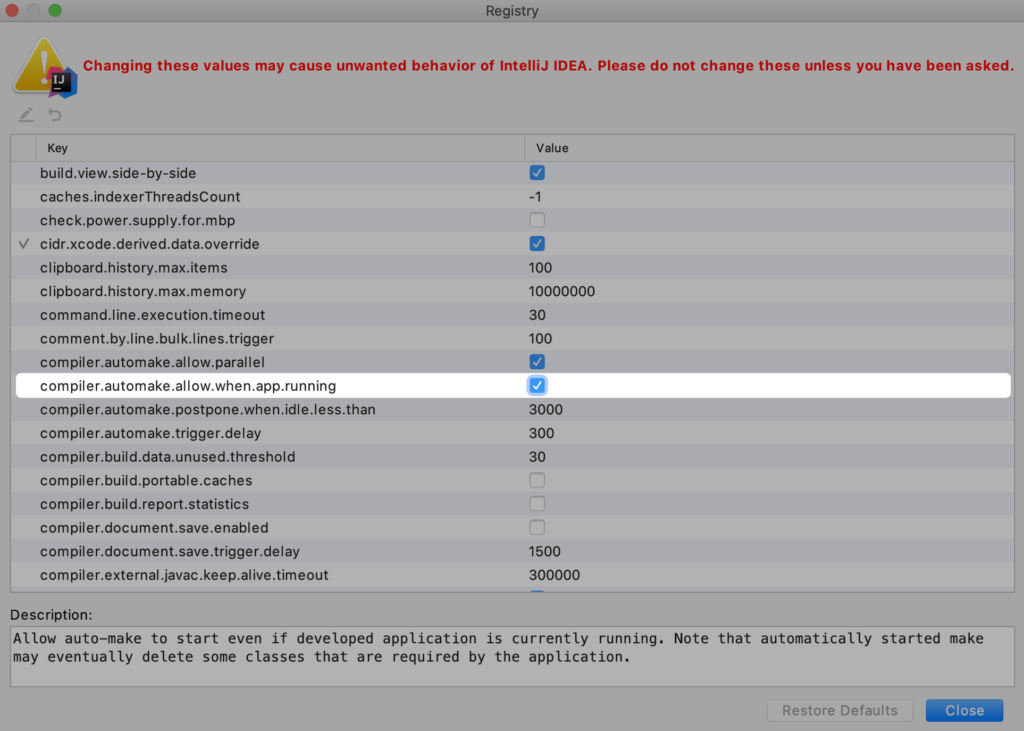
To open the registry, you need to press ctrl+shift+A if you’re a windows user. If you’re a mac user, press cmd+shift+A. In the search type ‘Registry’ and open it.
Once the registry is open on your screen, find this property called compiler.automake.allow.when.app.running and enable it as shown in the screenshot below.

Step 4. Restart your IntelliJ
Yaasss! It’s done! Restart your IntelliJ now and you’ll be able to hot swap in Spring Boot Application while your application is running.
Leave a Reply